I built a wireless split keyboard
My experience with a 36-key keyboard, Microdox

I recently built a compact split keyboard that works over Bluetooth. It’s pretty nice! Let me share with you some random tidbits I learned along the way about building keyboard firmware with ZMK.
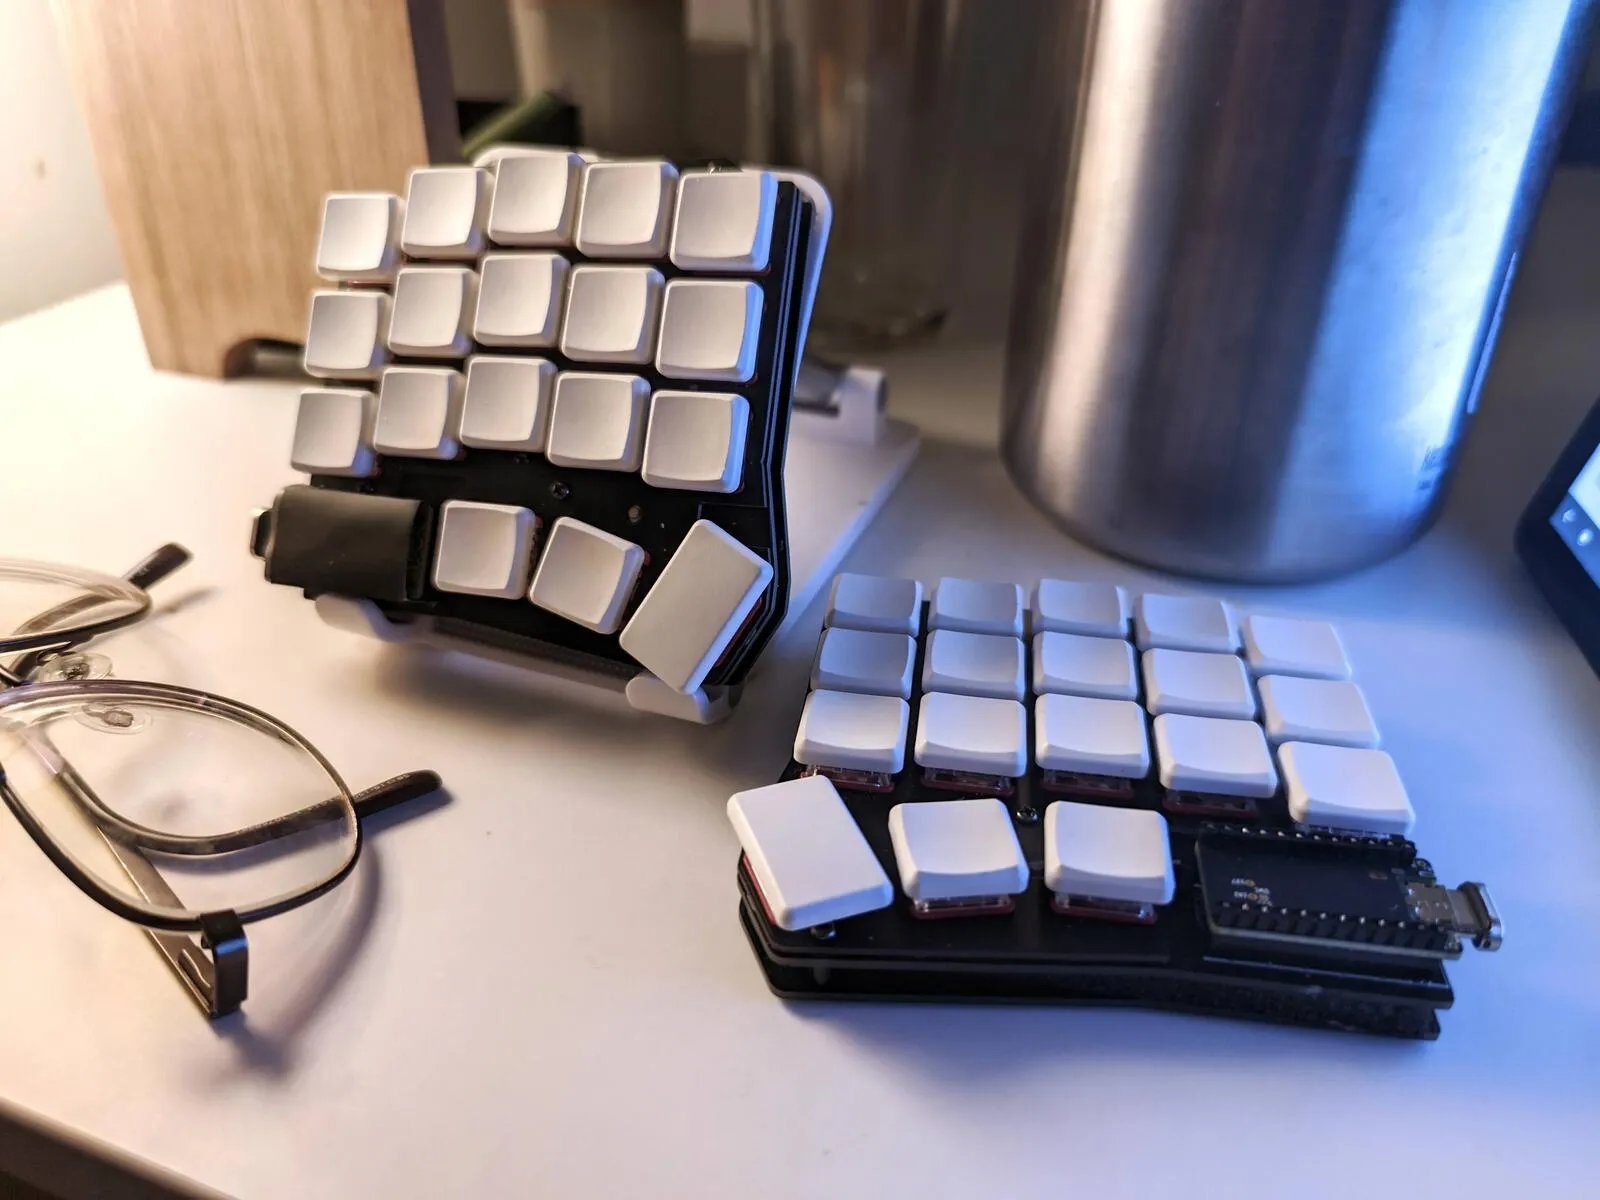
The keyboard is built using the Microdox kit from Boardsource. It uses a nice!nano v2 microcontroller on each half.
In this article:
What is it for?
I’ve been using wired compat split keyboards for a year now on my workstation. It’s great with my laptops, but there are a few things on my feature wishlist. I wanted to have:
- Swap between 4 devices (2 laptops, tablet, mobile).
- Sit on the couch while working.
- Write notes on my tablet anywhere in the house.
While I could have went with a pre-built keyboard, I didn’t want to compromise on having my custom compact split layout. I’ve decided that the answer to this list is to build a wireless, portable version of my main keyboard.
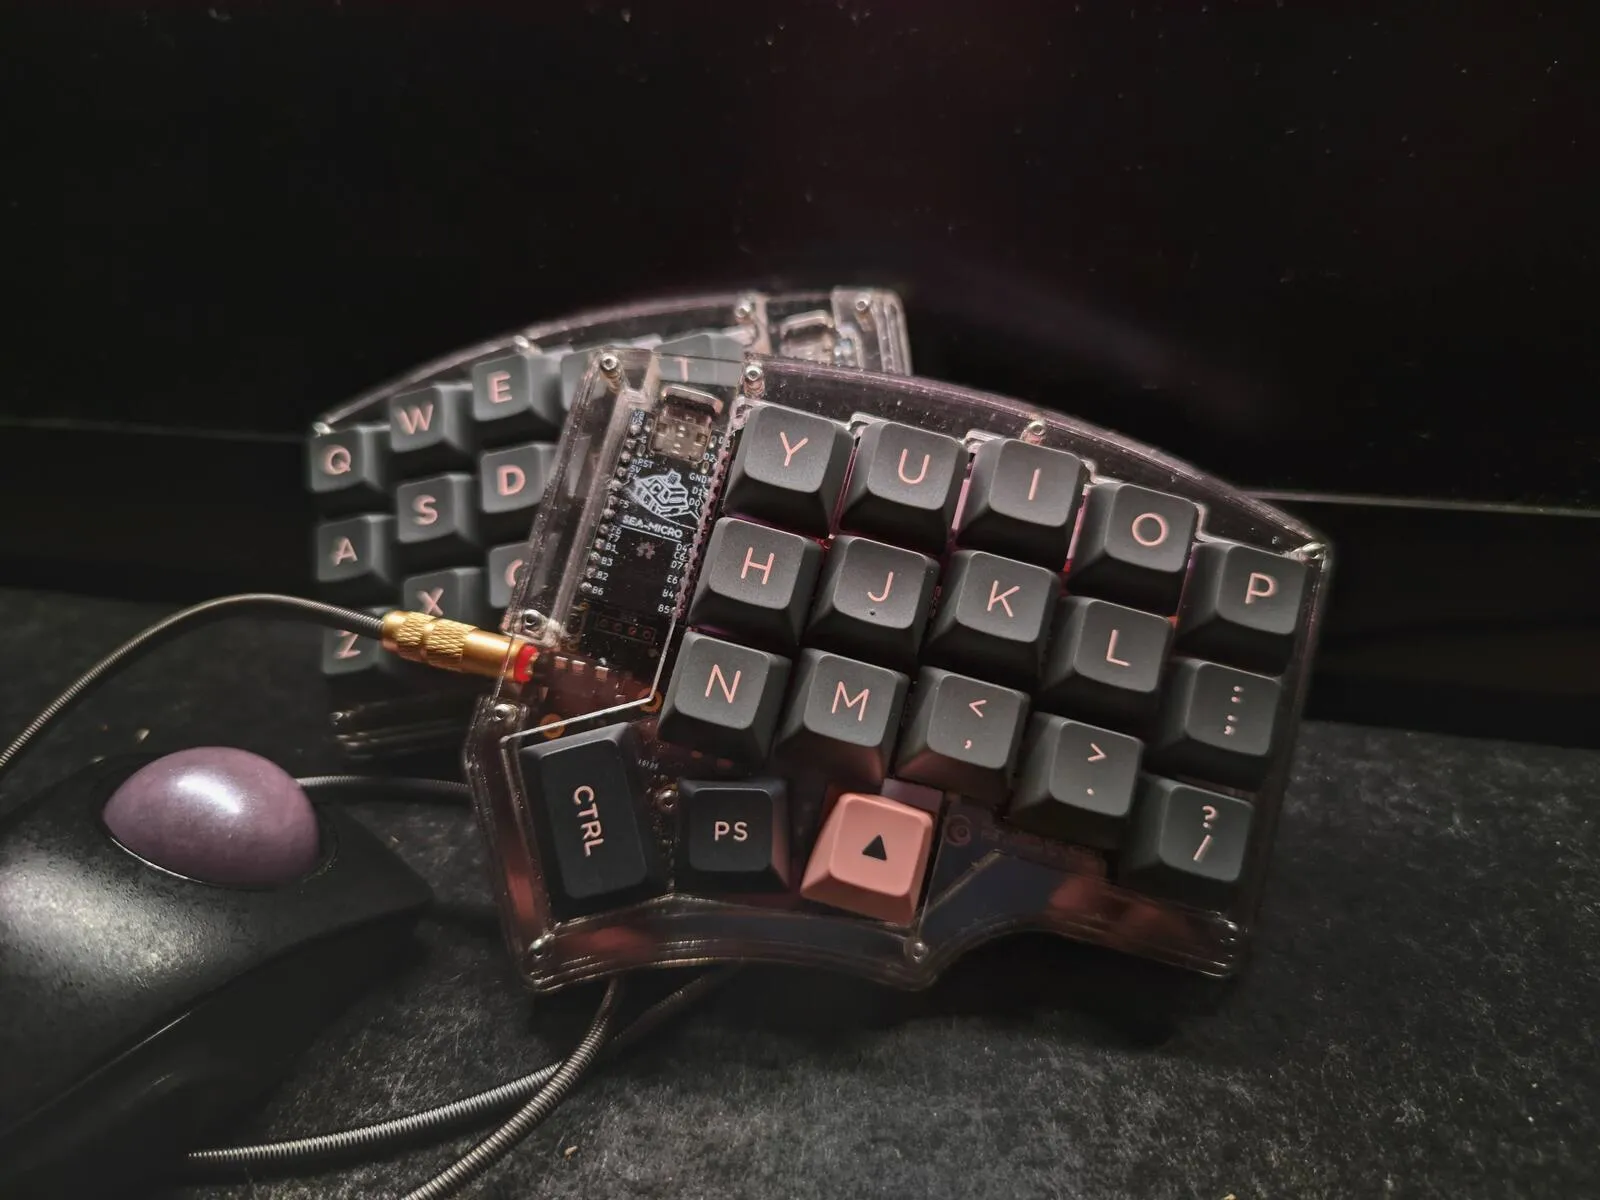
The main keyboard I've been using: a 5-column Corne keyboard with a custom acrylic case. Unlike the Microdox build, this doesn't support Bluetooth.
How I make 36 keys work
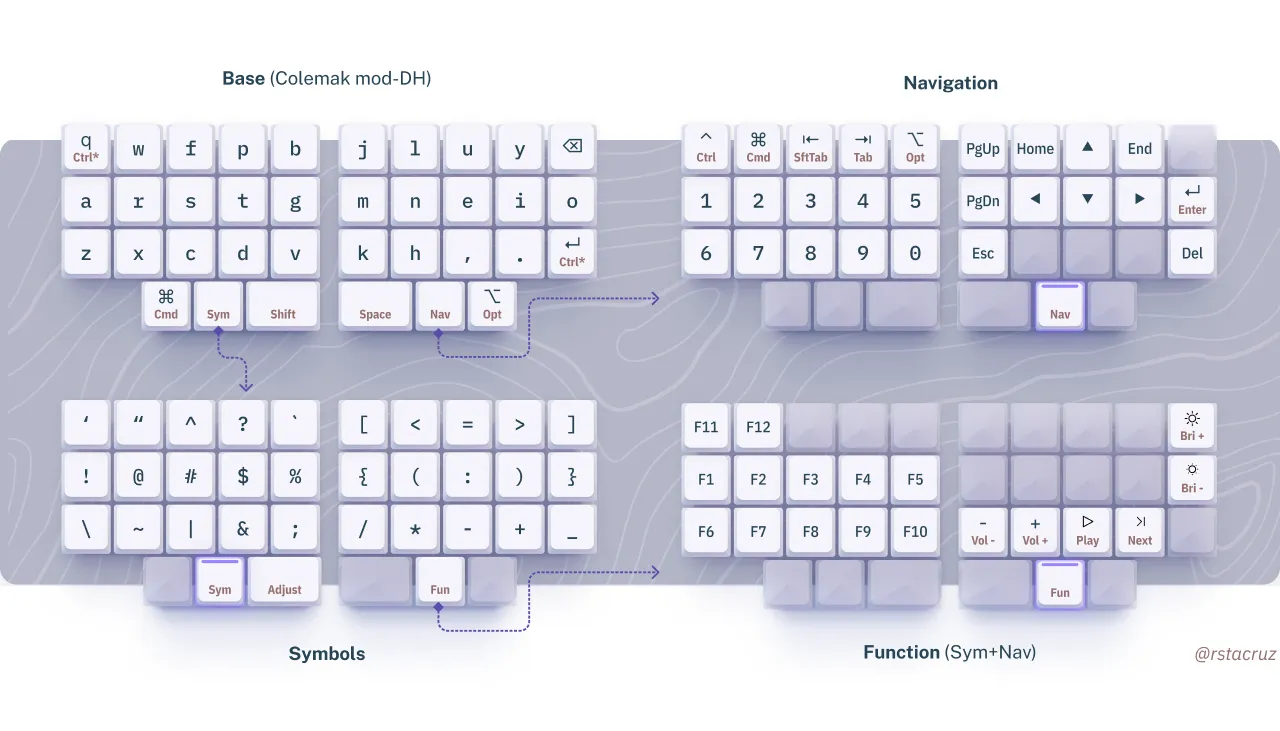
I’ve been working on a keymapping that allows me to have all keys of a full-sized keyboard in just 36 keys. There’s a lot to talk about here and I’d love to write about it in a future post, but here’s the basics:
-
Colemak mod-DH — The base layer is arranged in the Colemak mod-DH layout. Aside from being efficient on ortholinear keyboards, it also allows for a familiar placement of Backspace on a compact layout.
-
Modifier keys — There are dedicated keys for
CmdandOpt(orAltandWinin Windows), butCtrlandEnterare shared by one key (tap for Enter, hold for Ctrl). -
Layers — There’s a
Navkey to access numbers and arrows (a “layer” in QMK and ZMK terms). There’s aSymkey to access symbols.
Bluetooth reliability
Latency and reliability often depends per device. Here’s what I’ve been using it on:
-
MacBook Pro (2018) — 5/5 stars. Mostly very good. Latency is low, the range is far. Caveats: it disconnects sometimes, it doesn’t work on the FileVault login screen after rebooting (issue).
-
Android (Mi Note 10, 2019) — 4/5 stars. Mostly very good. I sometimes disconnect the keyboard using the Android UI, and this often means I need to reconnect it with the Android UI as well. Understandable, but can sometimes be inconvenient.
-
Chromebook (Lenovo Duet, 2020) — 3/5 stars. Okay. Sometimes takes a while to reconnect. There are times where re-pairing is needed—something I observed with Bluetooth mice too.
-
PC laptop — 1/5 star. I’m using a laptop with built-in a Intel wireless module that handles both Bluetooth and Wi-Fi, and generally is rather terrible at doing both at the same time. My potato laptop (2017) is to blame here.
Update (Nov 2023): Got a better laptop now (Dell 2022), Bluetooth works perfectly well on Windows and Linux. 5/5 stars.
Pairing
There’s two aspects of pairing to note: there’s pairing the left half with the right, and pairing the keyboard with a device.
Pairing between halves
Connection between both halves of the split keyboard is very solid. Here’s how it works:
-
Both halves pair automatically. This happens after they first turn on with working firmware. That is, an unpaired left half will automatically pair with an unpaired right half.
-
They will never unpair. They are bonded for life even after flashing a new firmware.
-
Forcing a connection — If the halves don’t see each other for some reason, pressing the reset button on each half at the same time will force them to reconnect.
-
Forcing halves to unpair — There’s a special ZMK firmware image that can to be flashed to make both halves forget each other. There’s almost never a case where this is needed, but I had to do it when replacing the nice!nano on one of the halves.
Pairing with devices
ZMK keyboards can pair with multiple devices using profiles. Here’s what I’ve observed so far on how ZMK handles profiles:
-
Staying connected — The keyboard keeps itself connected to all devices it’s paired to, even if it’s not the active profile. It might disconnect eventually, but the keyboard won’t attempt to reconnect for inactive profiles.
-
Activating a profile — Activating a Bluetooth profile (
&bt BT_SEL 0) will make the keyboard advertise itself and wait for the device to connect to it. In practice, this might mean taking a bit of time to reconnect if it’s already disconnected. -
USB and Bluetooth priority — There is a toggle to switch between USB priority (
&out OUT_USB) and Bluetooth priority (&out OUT_BLE). This only has an effect if it’s connected via both USB and Bluetooth at the same time.
Pairing caveats
-
Phone on-screen keyboards — The keyboard stays connected to devices, even phones. Having a keyboard connected might mean that on-screen keyboards won’t appear. On Android, it’s not much of an issue because double-tapping on a text field will force on-screen keyboards to appear.
-
Disconnecting — If the device is manually disconnected from the phone’s Bluetooth menu, it will not reconnect. The only way to reconnect it is to connect it again from the phone’s Bluetooth menu.
Update (Nov 2023): Android 14 now has an easy “toggle on-screen keyboard” function that allows on-screen keyboard to work even with a Bluetooth keyboard connected, so these are non-issues for me now.
ZMK firmware
Most keyboards are built using QMK firmware, but I chose to use the ZMK firmware for my keyboard. ZMK supports wireless keyboards, while QMK doesn’t.
I had to port over my QMK keymap to ZMK by hand. I personally found ZMK quite easy to get started with, and didn’t have too much trouble with it.
Eager debouncing
Debouncing is a feature of keyboards used to prevent double-presses common with imperfect soldering. Both ZMK (v2.5 on Nov 2021) and QMK have debouncing off by default, which adds a latency of 5ms per keypress.
I found that it’s best to turn this feature on. ZMK also supports eager-debouncing which minimises the latency down to 1ms.
# Debounce settings# https://zmk.dev/docs/features/debouncingCONFIG_ZMK_KSCAN_DEBOUNCE_PRESS_MS=1CONFIG_ZMK_KSCAN_DEBOUNCE_RELEASE_MS=5 See: Debouncing (zmk.dev)
Lock layer
I implemented a “lock keyboard” feature using layers. I found that it’s great to implement a way to “lock” the keys from being pressed. It can be useful for:
- Keeping the keyboard in a bag
- Changing keycaps or switches
- Cleaning the board
- In case of approaching pets or toddlers
- Fidgeting with the keyboard while thinking
lock_layer { // Lock bindings = < &mo ULOC &none &none &none &none &none &none &none &none &none &none &none &none &none &none &none &none &none &none &none &none &none &none &none &none &none &none &none &none &none &none &none &mo ULOC &none &none &none >;};unlock_layer { // Unlock bindings = < &tog LOCK &none &none &none &none &none &none &none &none &none &none &none &none &none &none &none &none &none &none &none &none &none &none &none &none &none &none &none &none &none &none &none &tog LOCK &none &none &none >;}; The "lock" layer has all keys set to
&none, and is turned on using &tog LOCK. I also added a way to exit this mode with two keypress. Toggling this layer will "lock" the keyboard. Sleep mode
There is an undocumented option to enable sleep mode called CONFIG_ZMK_SLEEP. This will turn off the device after not being used for a period of time. Caveat: it will take around 5 seconds to reconnect after waking up.
- To wake up — press any key on the left half to wake up the board. This will make the board try to reconnect to the laptop via Bluetooth.
- Use the left half to wake up — Since the primary half is the left, pressing a key on the right half will not reconnect the keyboard to the computer.
In the end, I turned off sleep mode. 5 seconds to wake up was too long. Since I use the keyboard semi-wirelessly around 75% of the time, I never need to worry about charging.
CONFIG_ZMK_SLEEP=yCONFIG_ZMK_IDLE_SLEEP_TIMEOUT=2700000# 2700000 = 45mins# 3600000 = 1hr The setting
CONFIG_ZMK_SLEEP is undocumented, but you can verify its existence with the GitHub repos that use it. Battery life
I used a 110mAh battery, which is the smallest battery you can get away with on the nice!nano. I’ve heard from others making builds with up to 3,000mAh, but given I was using this wired from time to time, I’m happy with a small battery.
The left half drains by around 8% everyday. The right half lasts forever. This is probably 1 to 2 weeks of use before needing a charge on the left. The ZMK power profiler estimates that the right half will last up to 2 months of daily use.
Soldered on battery
I initially thought of adding an on/off power switch, but I opted to solder the battery directly to the keyboard.
There are two reasons I thought I’d need a physical switch for: to save battery life, and to prevent keypresses when the keyboard is stored away. ZMK’s sleep functionality can take care of the first, while a lock layer can take care of the second.
This means there’s no way to turn the keyboard completely off, and I found that it’s okay. Our phones work the same way after all!
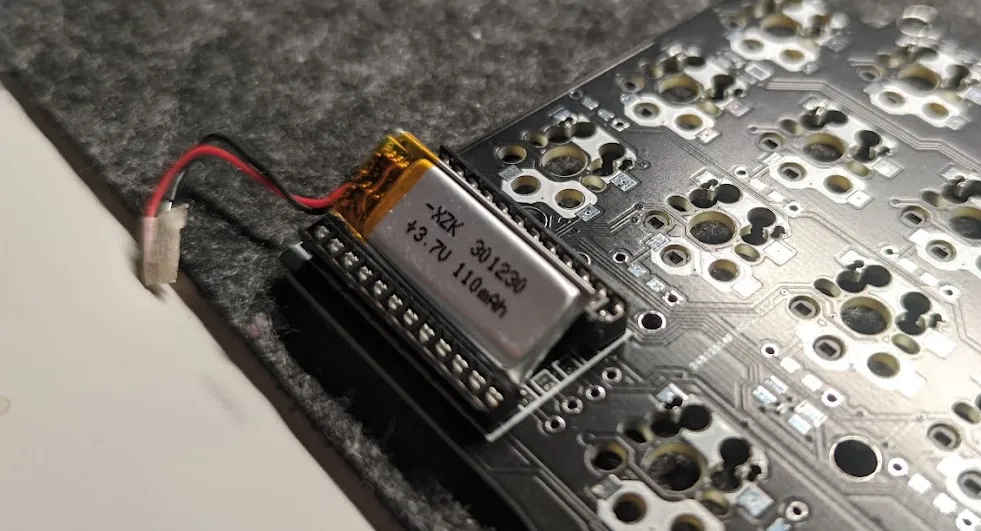
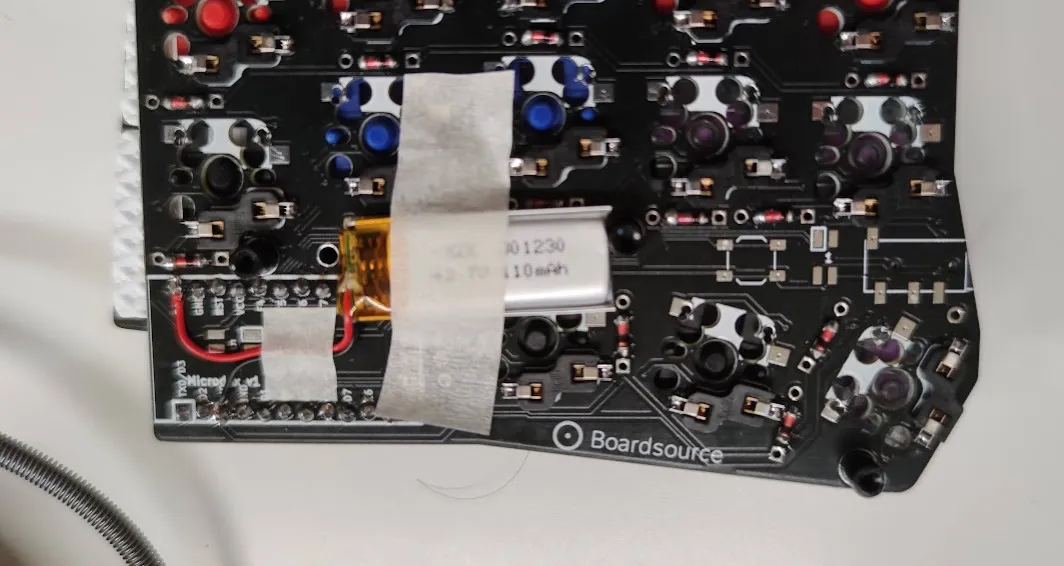
Shown: a 301230 battery, 110mAh. I also chose to solder the battery under the PCB rather than under the MCU.
Getting battery info
Getting the battery percentage is tricky without an OLED screen. The battery meter for the left half is reported on these platforms over Bluetooth: Linux (via upower -d), ChromeOS, MacOS (Monterey).
I’ve found that is not reported on these platforms: Windows, MacOS Big Sur, Android.
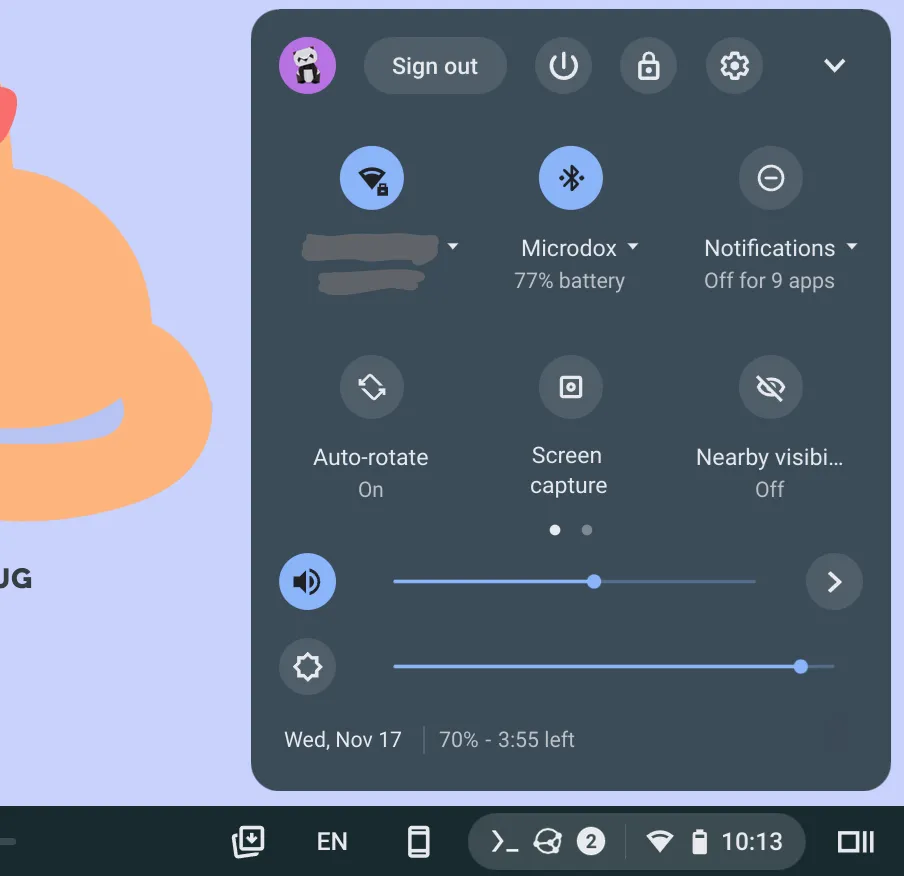
Battery usage for the left half is reported on ChromeOS. I don't think there's a way of getting the battery percentage on the right half.
Other notes
Semi-wireless on the desktop
My favourite way of using the keyboard is in what I’d call semi-wireless mode, with the left half being wired to the laptop, and the right half being wireless.
This allows me to overcome Bluetooth flakiness and latency. Connection between the two halves is very consistent and reliable, while some laptops and tablets can sometimes be a hit-or-miss (more on this later).
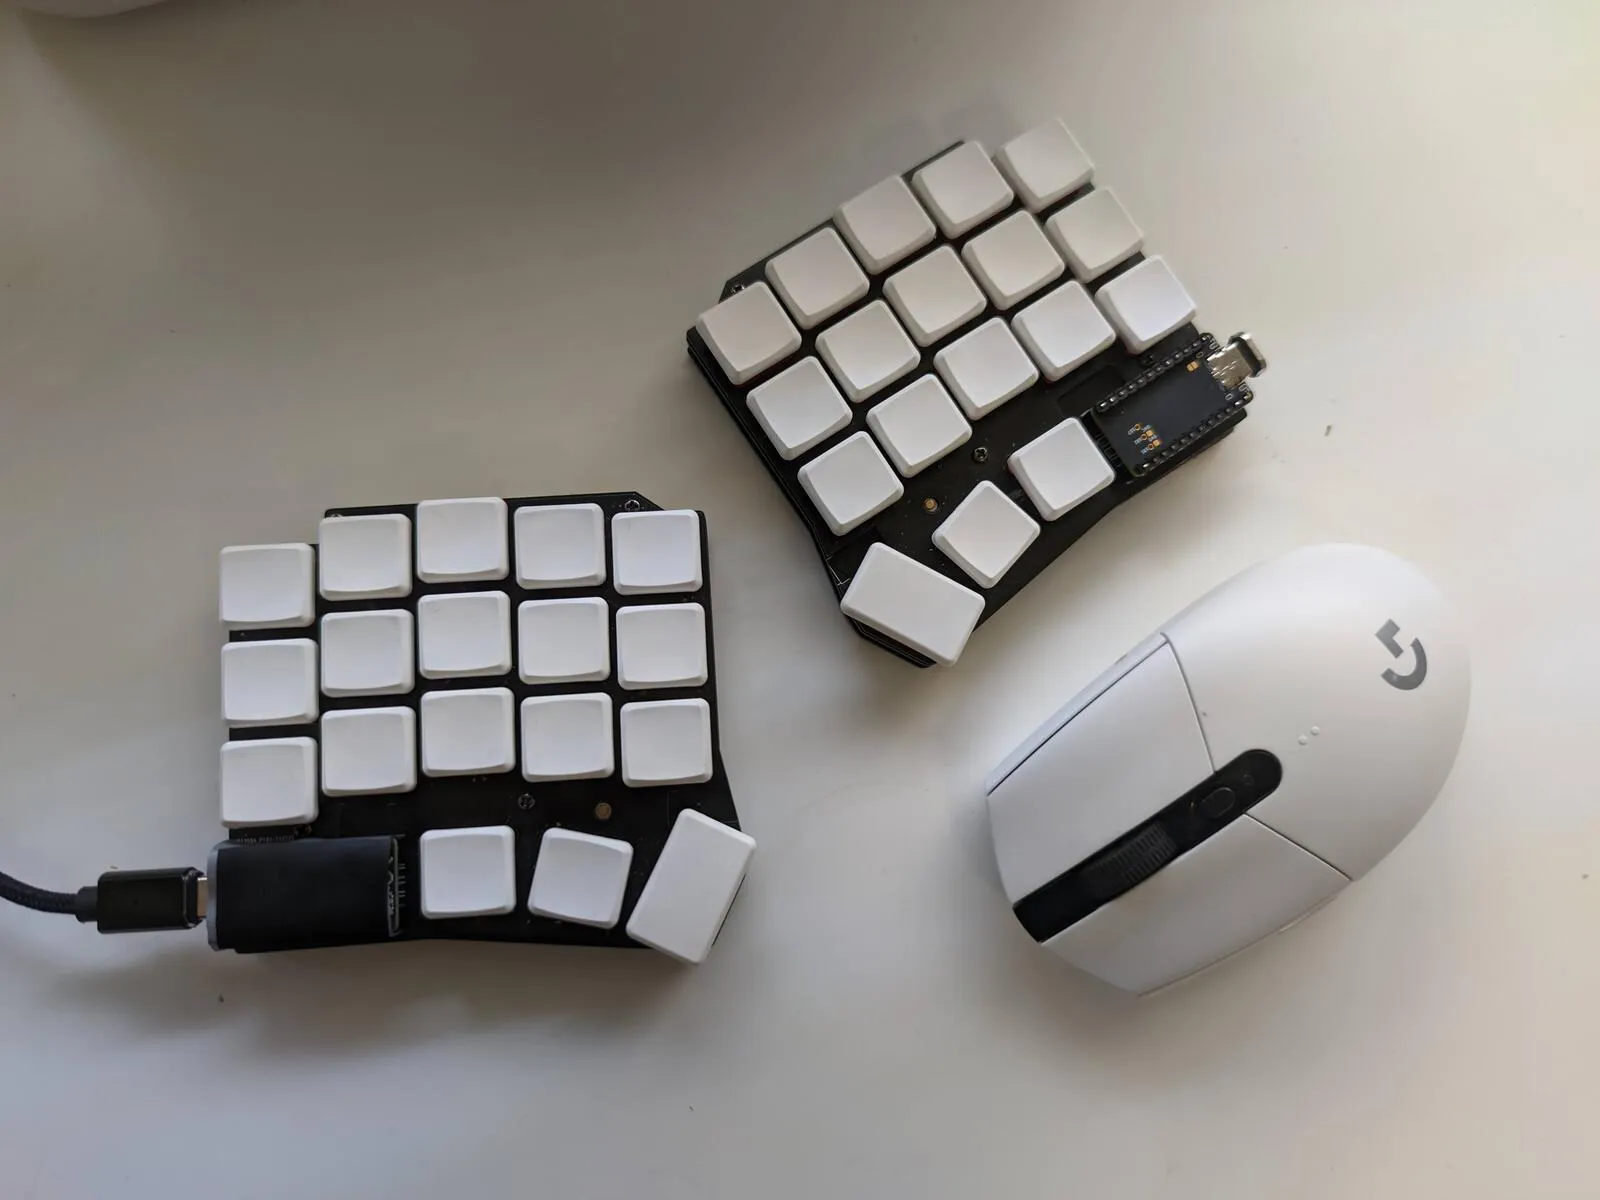
Microdox wireless split keyboard with a Logitech G304 mouse. Bonus: this charges the battery of the left half as well.
Replaced my nice!nano
I ended up having to buy another pair of nice!nano v2 micro-controllers. I encountered some issues with the original ones I had:
-
The left one just died. It was getting warm to touch when I plug it in, which might suggest there’s a short caused by some bad soldering.
-
The right one didn’t hold a charge. WHen I tested it with a multimeter, I found that there’s less resistance between the battery terminals compared to a healthy unit. I think this implies that there is a very slight short somewhere.
Update (Nov 2023): I’ve since narrowed this down to most likely a bad USB cable which has gone to kill some other devices as well.
Reset button
There is a hardware reset button on my build. I’d press this once to reboot the firmware, or twice to enter bootloader mode to allow reflashing.
This might be specific to my build, but I find that sometimes I need to press the hardware reset button after leaving the keyboard alone for a while. Not sure if this is because the firmware crashed, or I have some shoddy soldering somewhere.
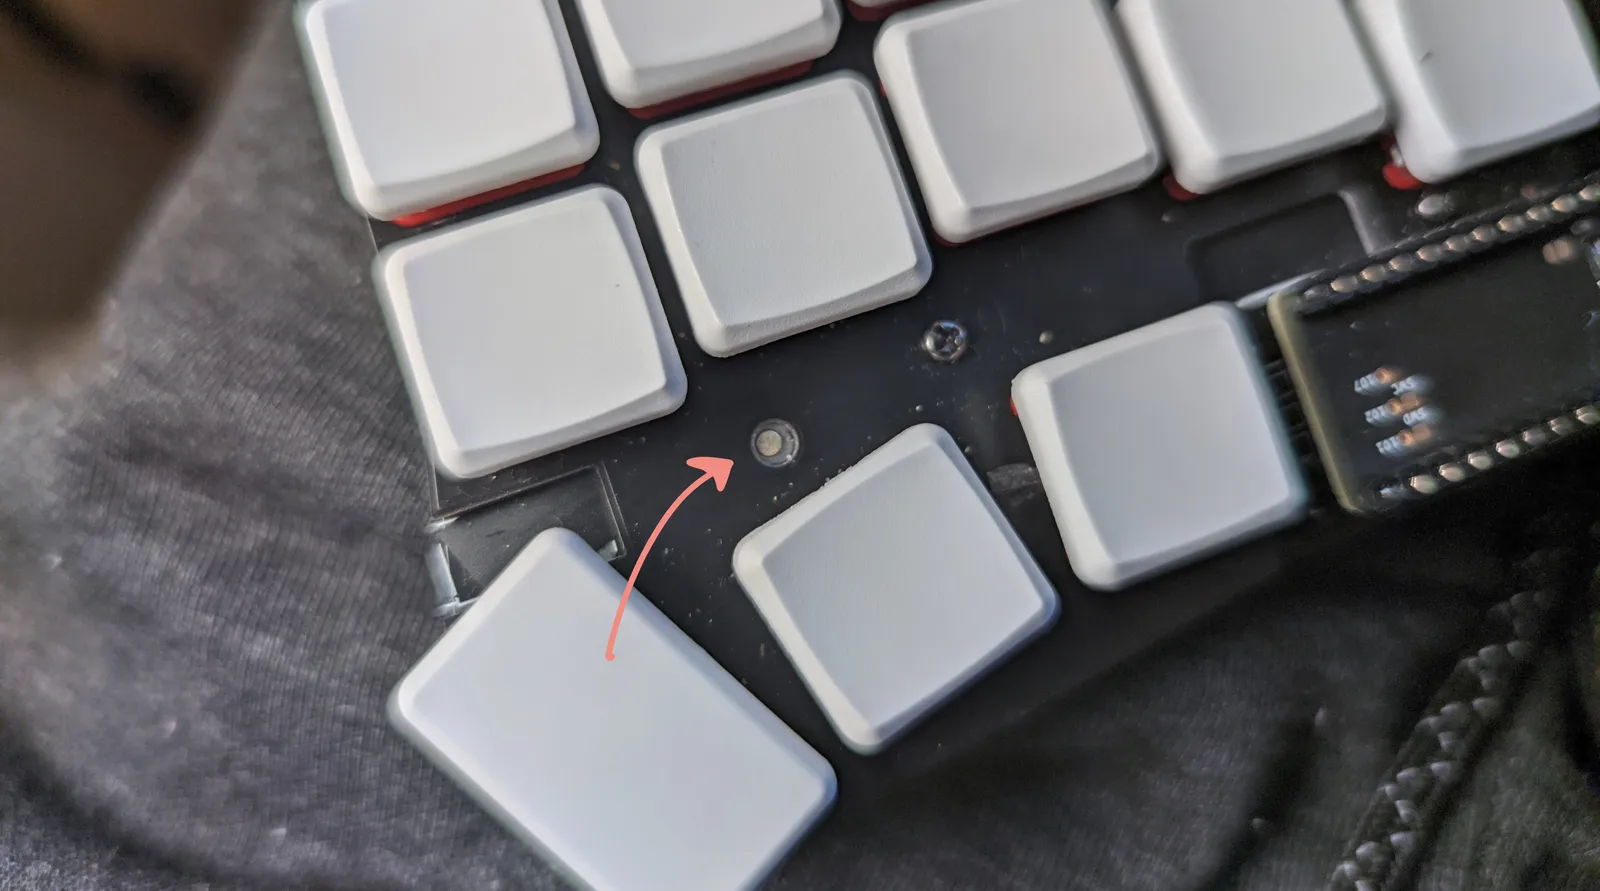
The reset button is a small, physical button that can be poked by a pen.
Random takes
Some more random bullet points:
-
There’s no low power notification. I was surprised once when the right half stopped working, only to find out that it ran out of power.
-
I was wondering if I can take this in airplanes, given it’s always-on. I learned that the FAA page literally says “You can also continue to use short-range Bluetooth accessories, like wireless keyboards” (link).
-
One inconvenient way to get the right-hand side battery percentage is by using a multimeter. Measuring the voltage between the B- and B+ pins gets the approximate battery power left. In my set up,
4.2Vis full.
I am a web developer helping make the world a better place through JavaScript, Ruby, and UI design. I write articles like these often. If you'd like to stay in touch, subscribe to my list.